THE CANNEY VALLEY
Installing Ubuntu on your VirtualBox VM
1 min to read

So, you created a VirtualBox VM. Great! Now, you need to install an operating system to make it usable. In this article, we'll install Ubuntu v18.04.2.
Pre-requisits
To install Ubuntu on your VM
- In VirtualBox Manager, on the left-hand side, double click the virtual machine you want to install Ubuntu on.

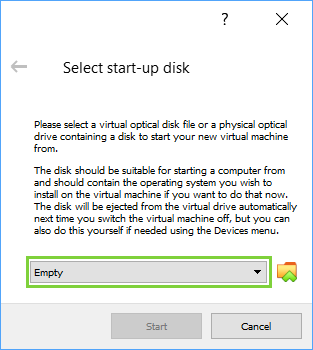
- On the Select start-up disk window, click the folder icon to navigate to and select the Ubuntu Virtual Disk Image you downloaded earlier, then click Start.
- On the Welcome window, select the language you want the OS to run in, then click Install Ubuntu.
- On the next window, select your keyboard layout, then test it and click Continue.
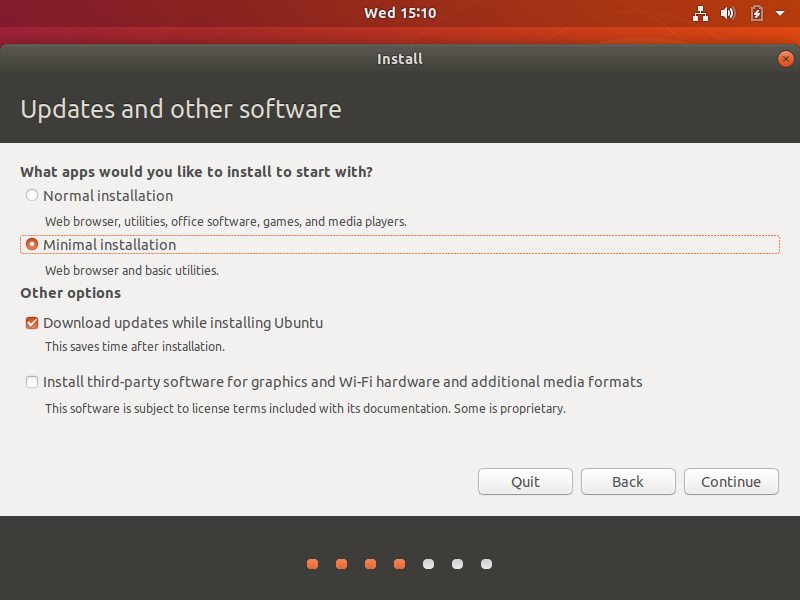
- On the next window, select "Minimal installation" and Download updates while installing Ubuntu, then click Continue.

- On the next window, select "Erase disk and install Ubuntu," then click Install Now.
- On the confirmation window, click Continue.
- On the next window, select your time zone, then click Continue.
- On the next window, fill out the information fields as appropriate, then click Continue.